Roam freely at the World Cup with The Football Fever Travel eSIM
The 2026 FIFA World Cup, the biggest in history, expanding across three nations and redefining global football on an unprecedented scale.
Team
27 Jul 2026
Check on this list if your device is compatible with Mozillion Travel eSIM services.
If your device is compatible with Mozillion Travel eSIM services, it must be equipped with an eSIM or a physical SIM card.
Your device is equipped with an eSIM:
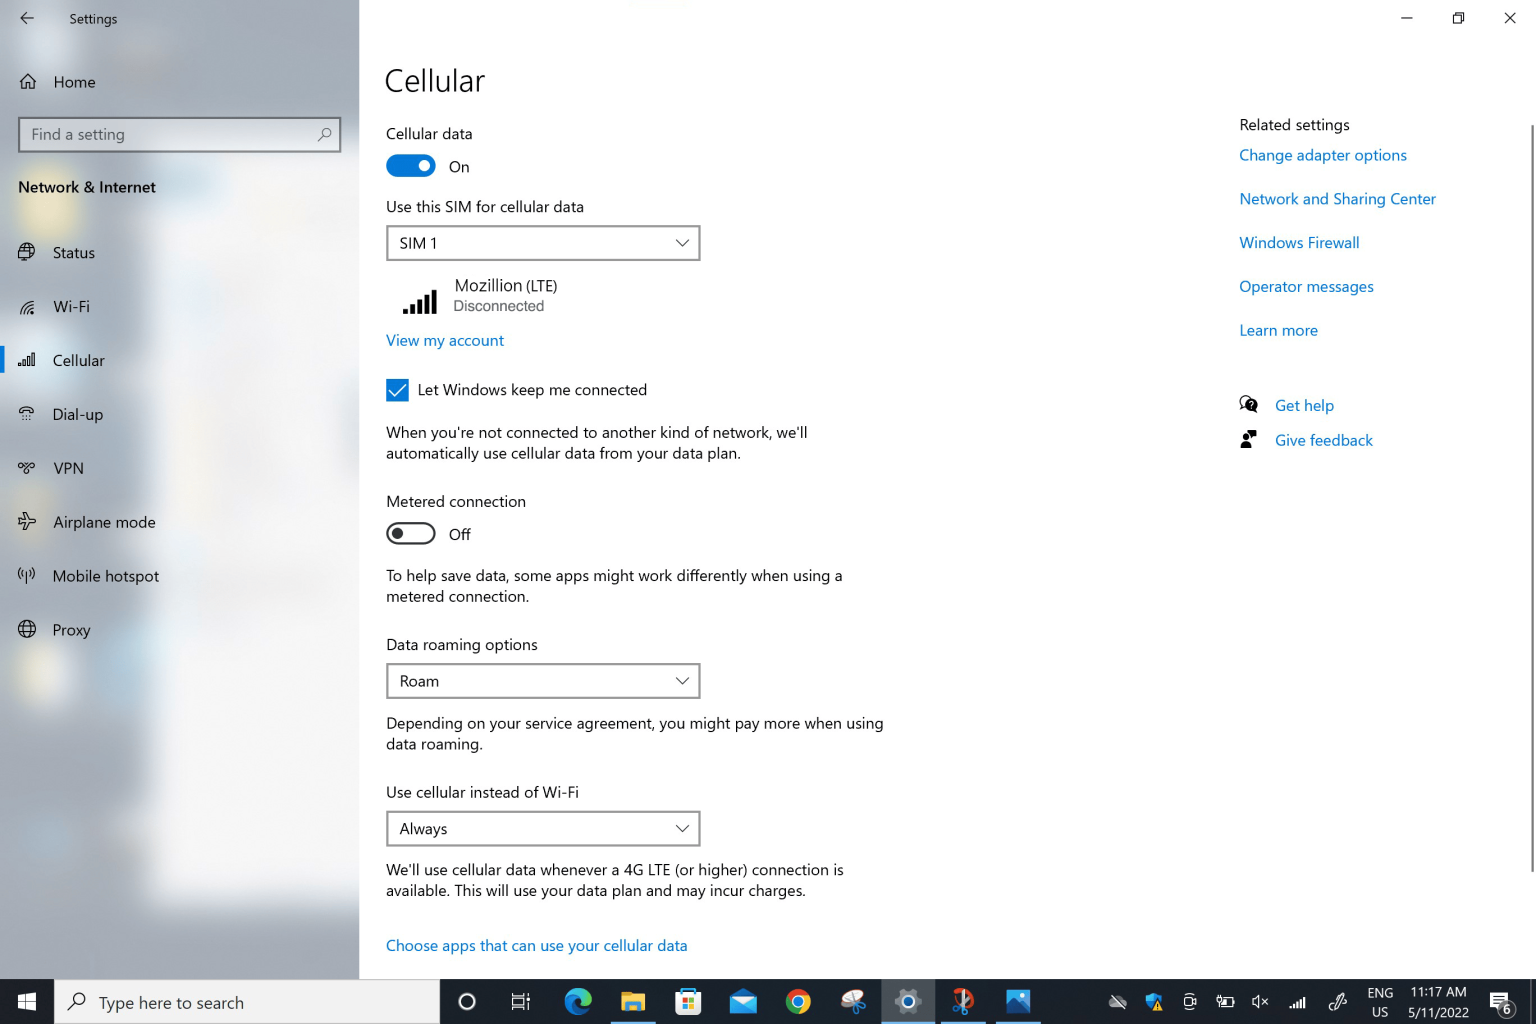
Check now if an eSIM profile is installed on your device. Go to: Start > Settings > Networks & Internet > Cellular.
In the menu “Use this SIM for cellular data”:
– If a Mozillion Travel eSIM profile is installed, it will appear in the list. Select it (when the right one is selected, the name Mozillion will be displayed right under it).
– If no Mozillion Travel eSIM profile is installed, please follow instructions here to install a Mozillion Travel eSIM profile.
Once the Mozillion Travel eSIM profile is installed, go to the next step.
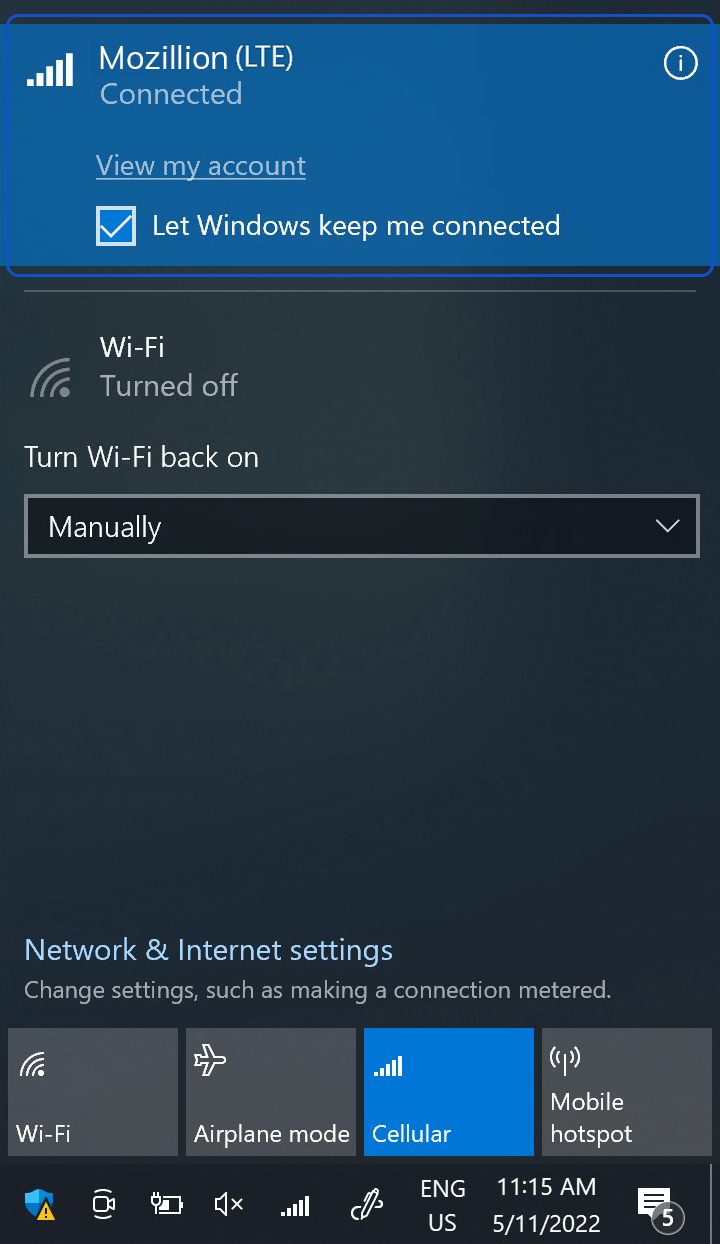
On the network flyout, ensure that:
Cellular (or Mobile) is Activated. Wi-Fi is Deactivated.
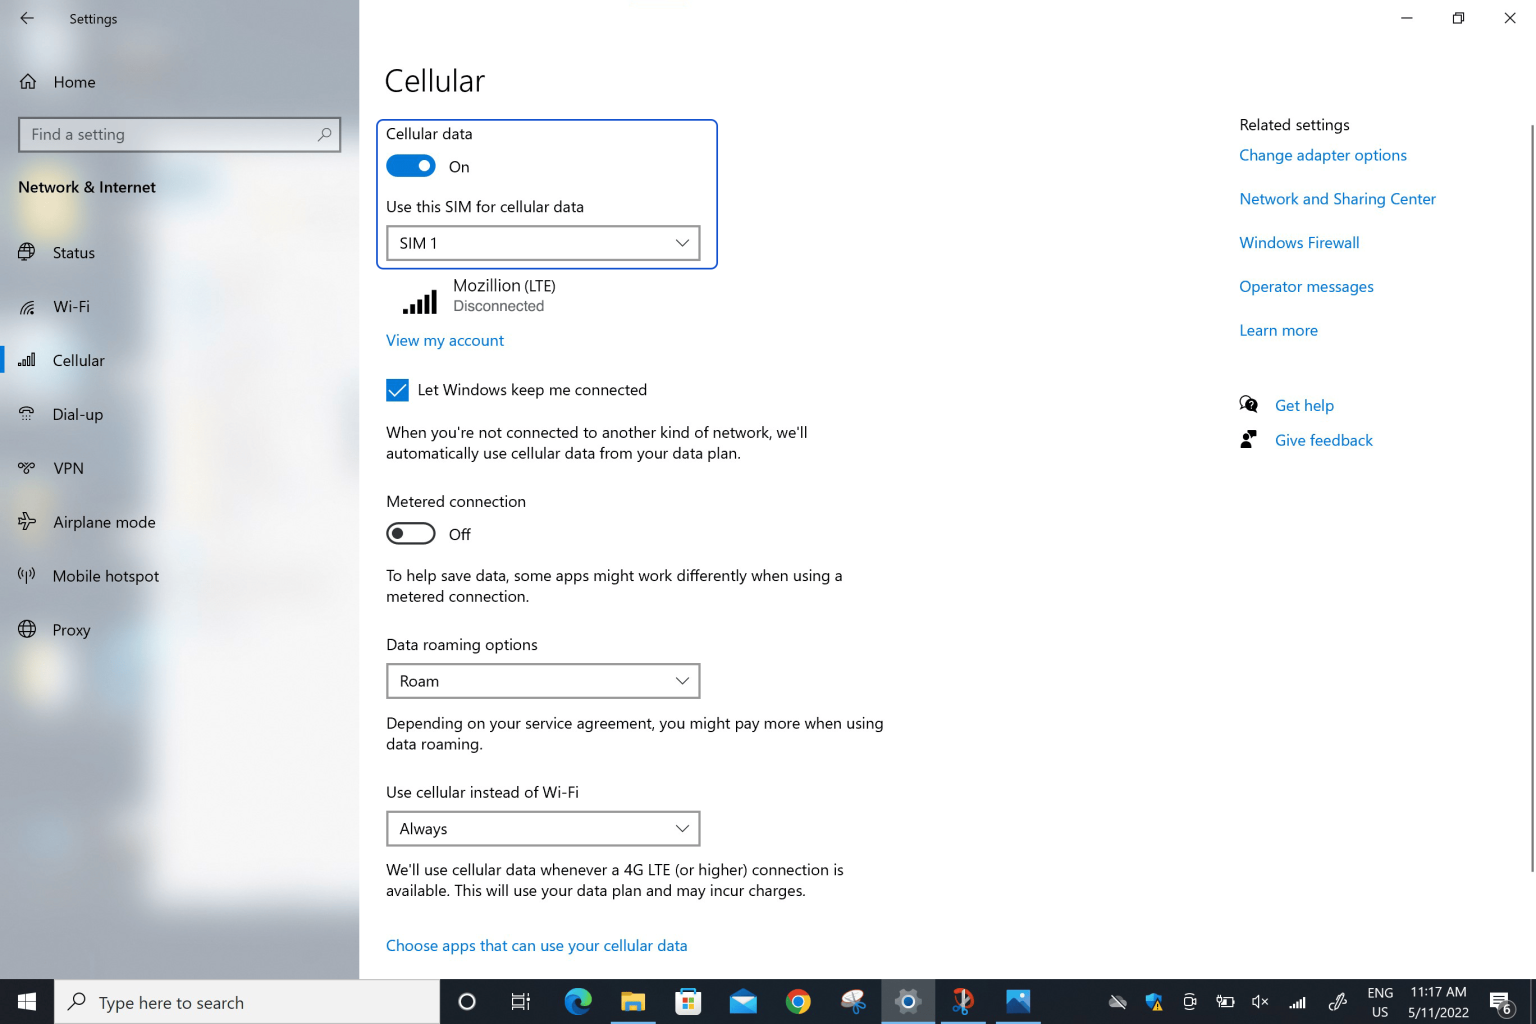
Make sure that Roam is set on the Data roaming options field:
Go to: Start > Settings > Networks & Internet > Cellular. In the field “Data Roaming Options”, choose Roam.
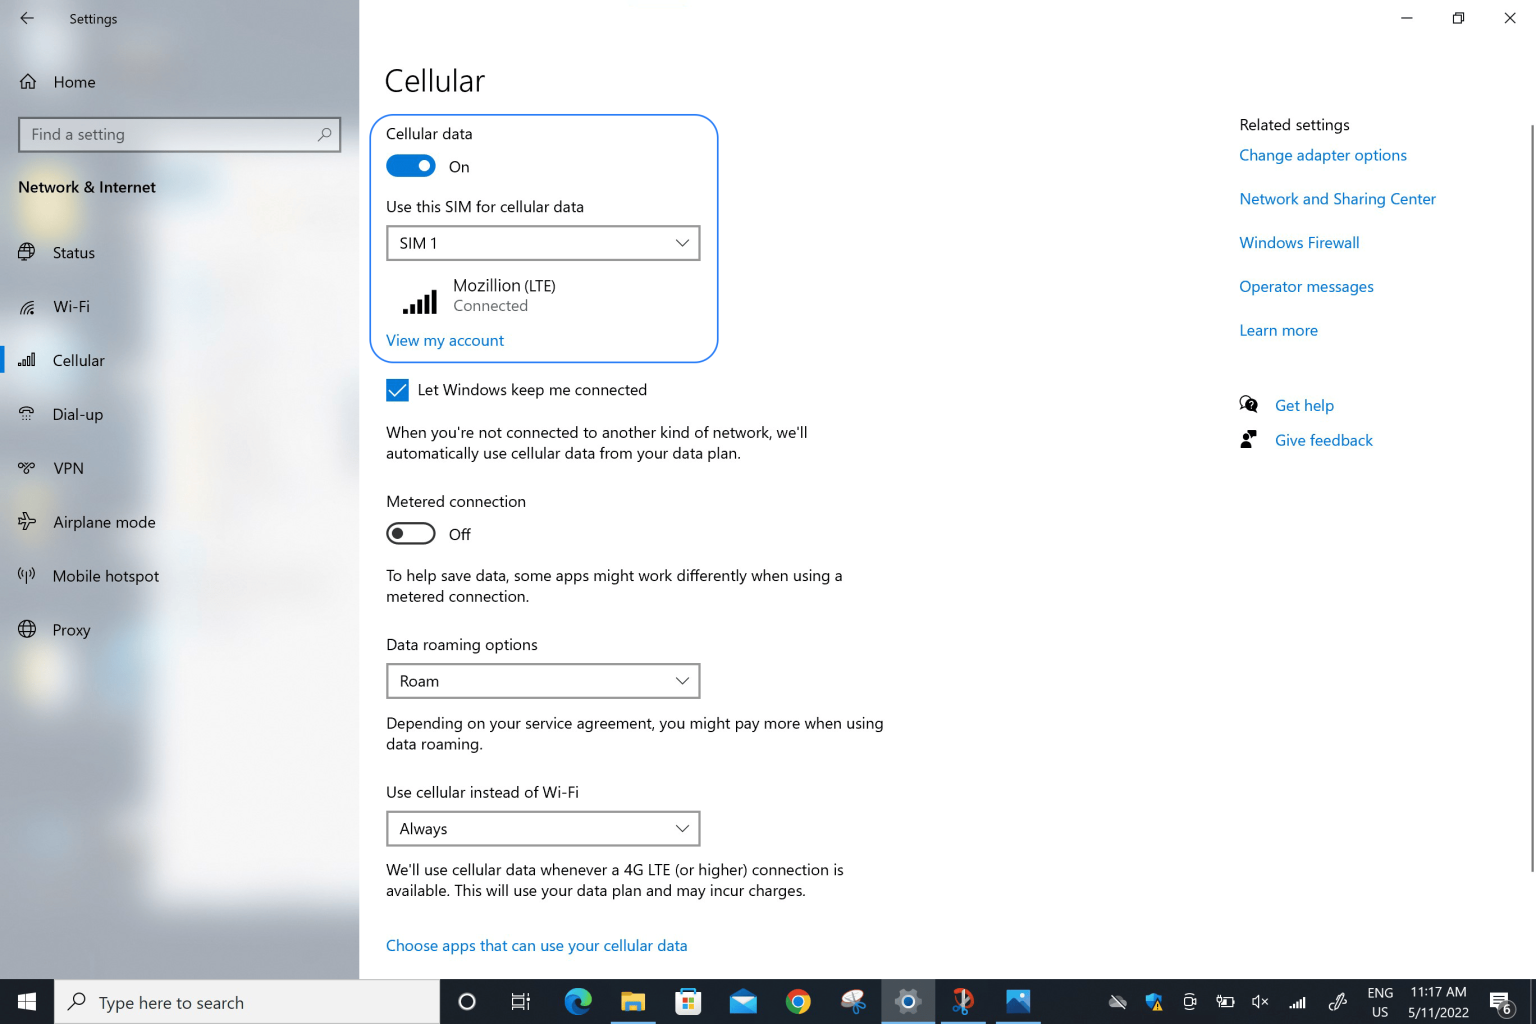
WARNING: if you have carefully followed previous steps, your Mozillion Travel eSIM profile is now used for the cellular data connection (and NOT your physical SIM card if you have one, or any other eSIM profile). This means that you won’t have extra roaming costs as Mozillion Travel eSIM rates will be applied while using the Mozillion Travel eSIM cellular connectivity. In any case, always ensure that your Mozillion Travel eSIM profile is selected for cellular data to avoid extra roaming costs while abroad.
Now ensure that the APN (Access Point Name) is correctly set on your device.
Go to: Settings > Networks & Internet > Mobile, then Mobile Operator Settings.
If APN mbb appears on Internet APN or Attach APN lists, go directly to the step 5.
If the Mozillion Travel eSIM APN does not appear, go to the next step.
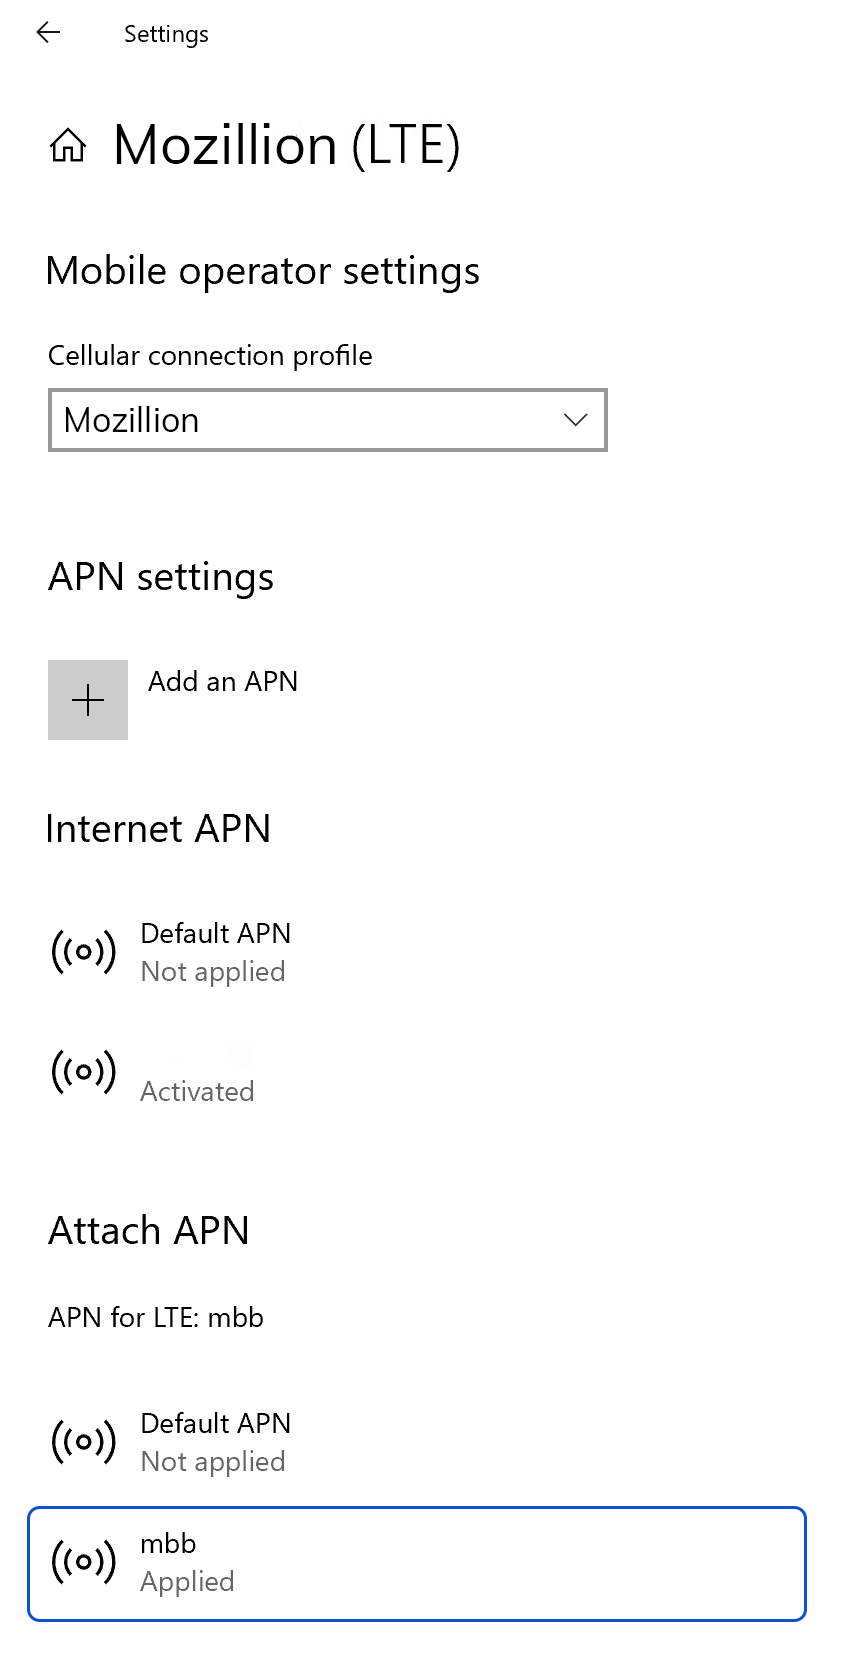
If the Mozillion Travel eSIM APN does not appear, click on “Add an APN” and fill in:
– Profile name: Mozillion
– APN: mbb
Check the box “Apply this profile” and click on Save.
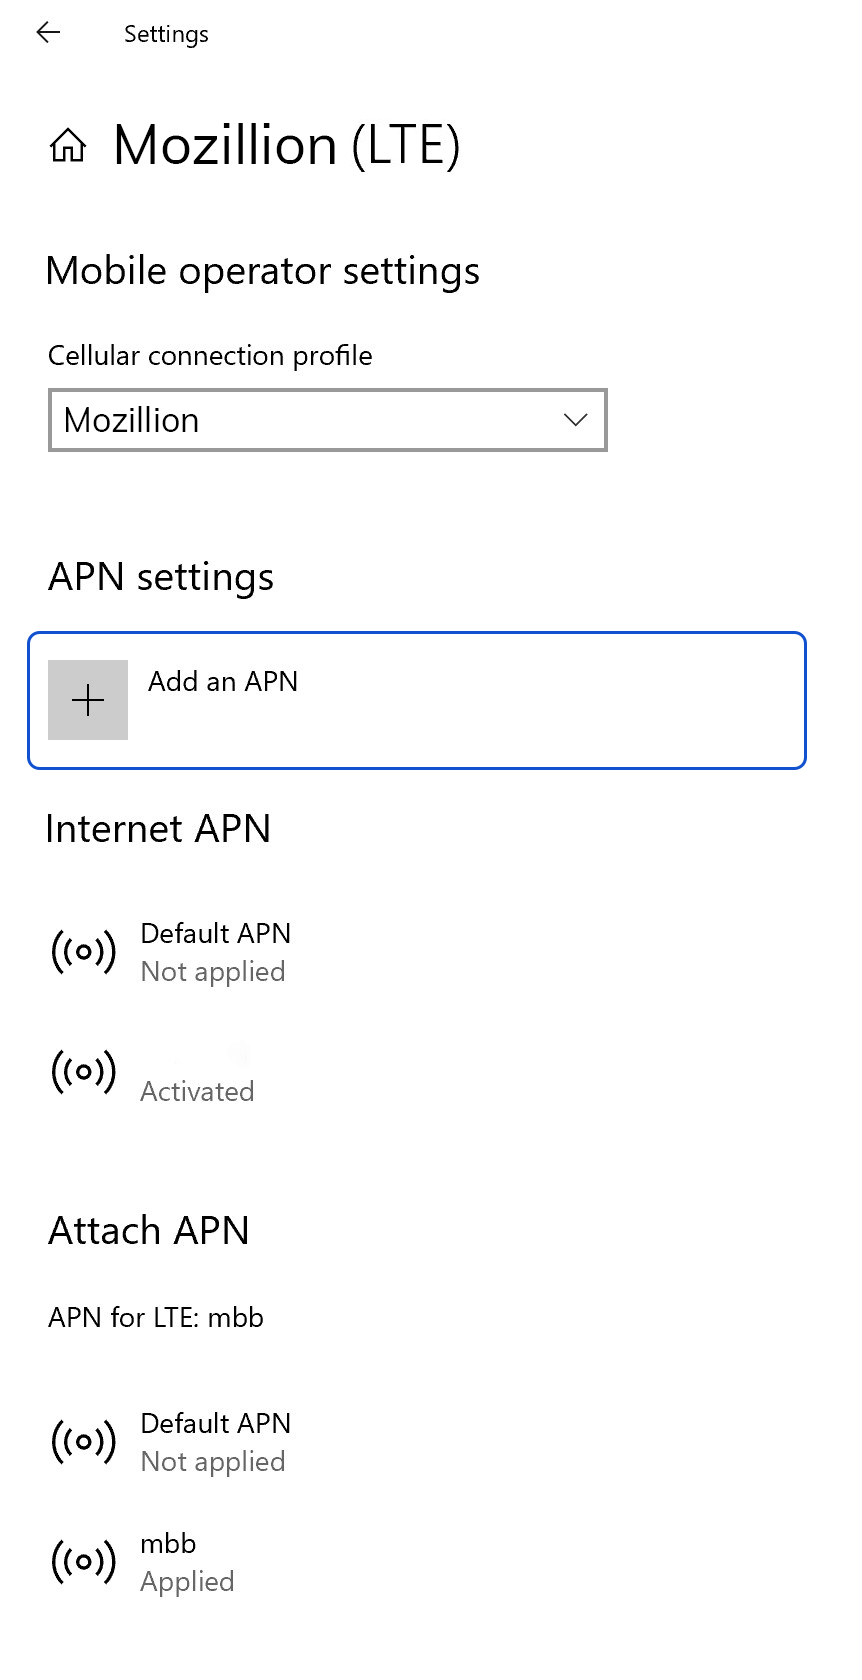
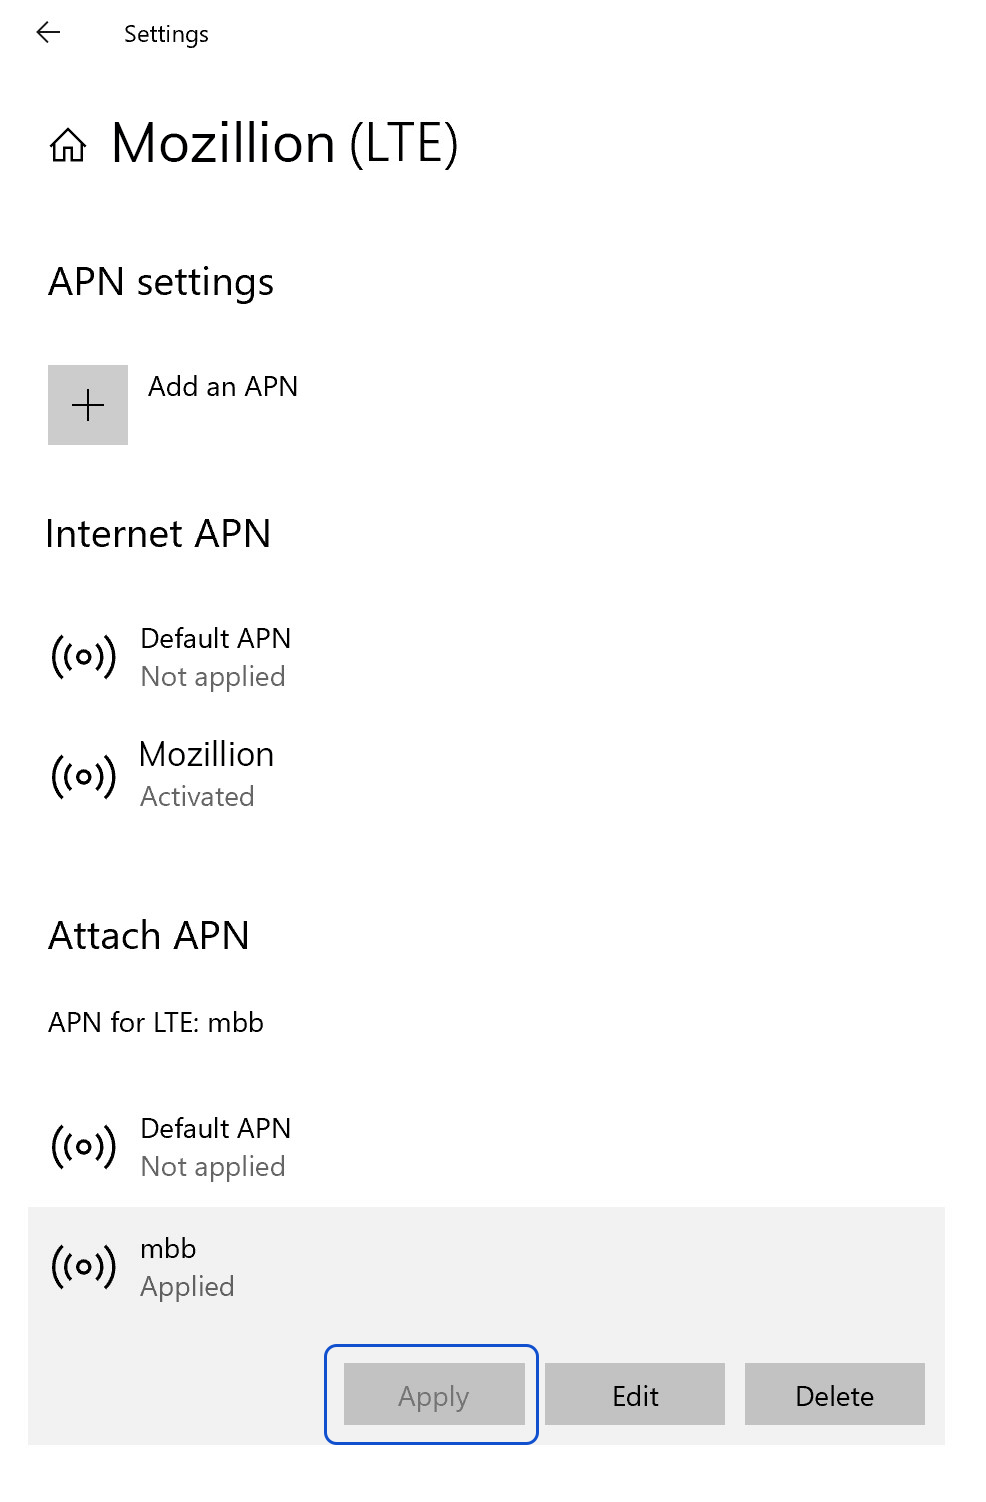
Now make sure that the Mozillion Travel eSIM APN appears as “Applied”.
If not, click on it to display more options and click on Apply button.
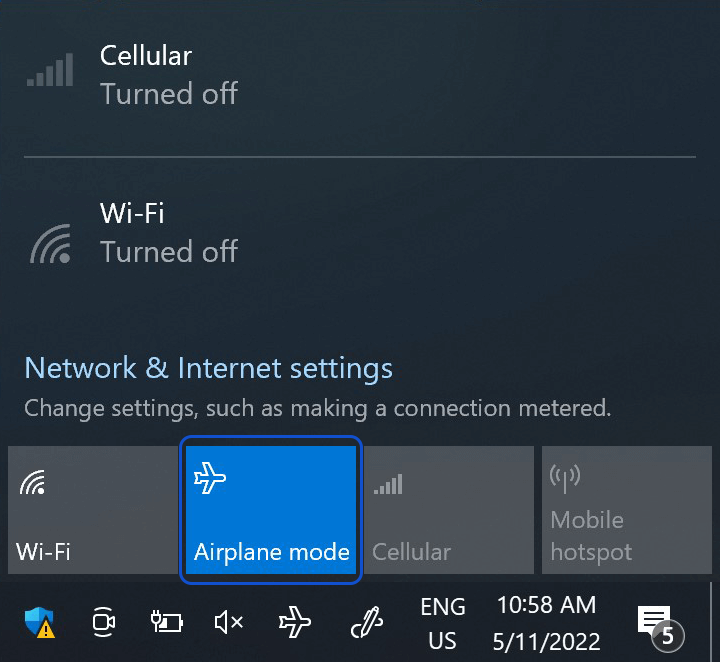
At this step, turn ON “flight mode” for 5 secondes and turn it OFF. This action will refresh the network connection from your device.
Once you are connected to the network, you will see a network icon appear on the bottom line.
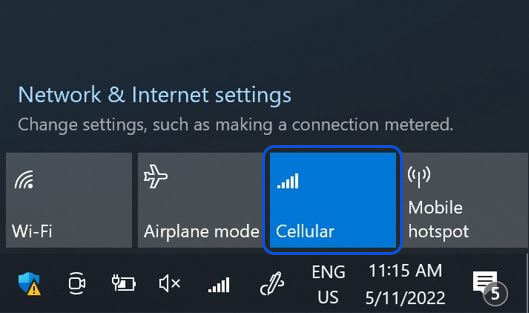
At this step, test your Travel eSIM connectivity by opening the network flyout and click on “View My Account”.
Or open a browser and go to mozillion.com/travel-sim
NB: In case you still have no network bars displayed, please contact our Customer Support for further help and provide the ICCID of your eSIM profile.
The 2026 FIFA World Cup, the biggest in history, expanding across three nations and redefining global football on an unprecedented scale.

Mountains, beaches, ancient towns, markets, and some of the best food in the world – Vietnam has everything, and this backpacker route from south to north with 10 destinations takes you through all of it.

Are you planning your trip to Europe? Thinking of spending days walking along beaches on the Amalfi coast, looking around the Sagrada Familia in Barcelona or catching the Northern lights in Iceland? Well, Mozillion’s European Regional eSIMs will offer you effortless connectivity throughout your trip across up to 55 countries with just one simple download.